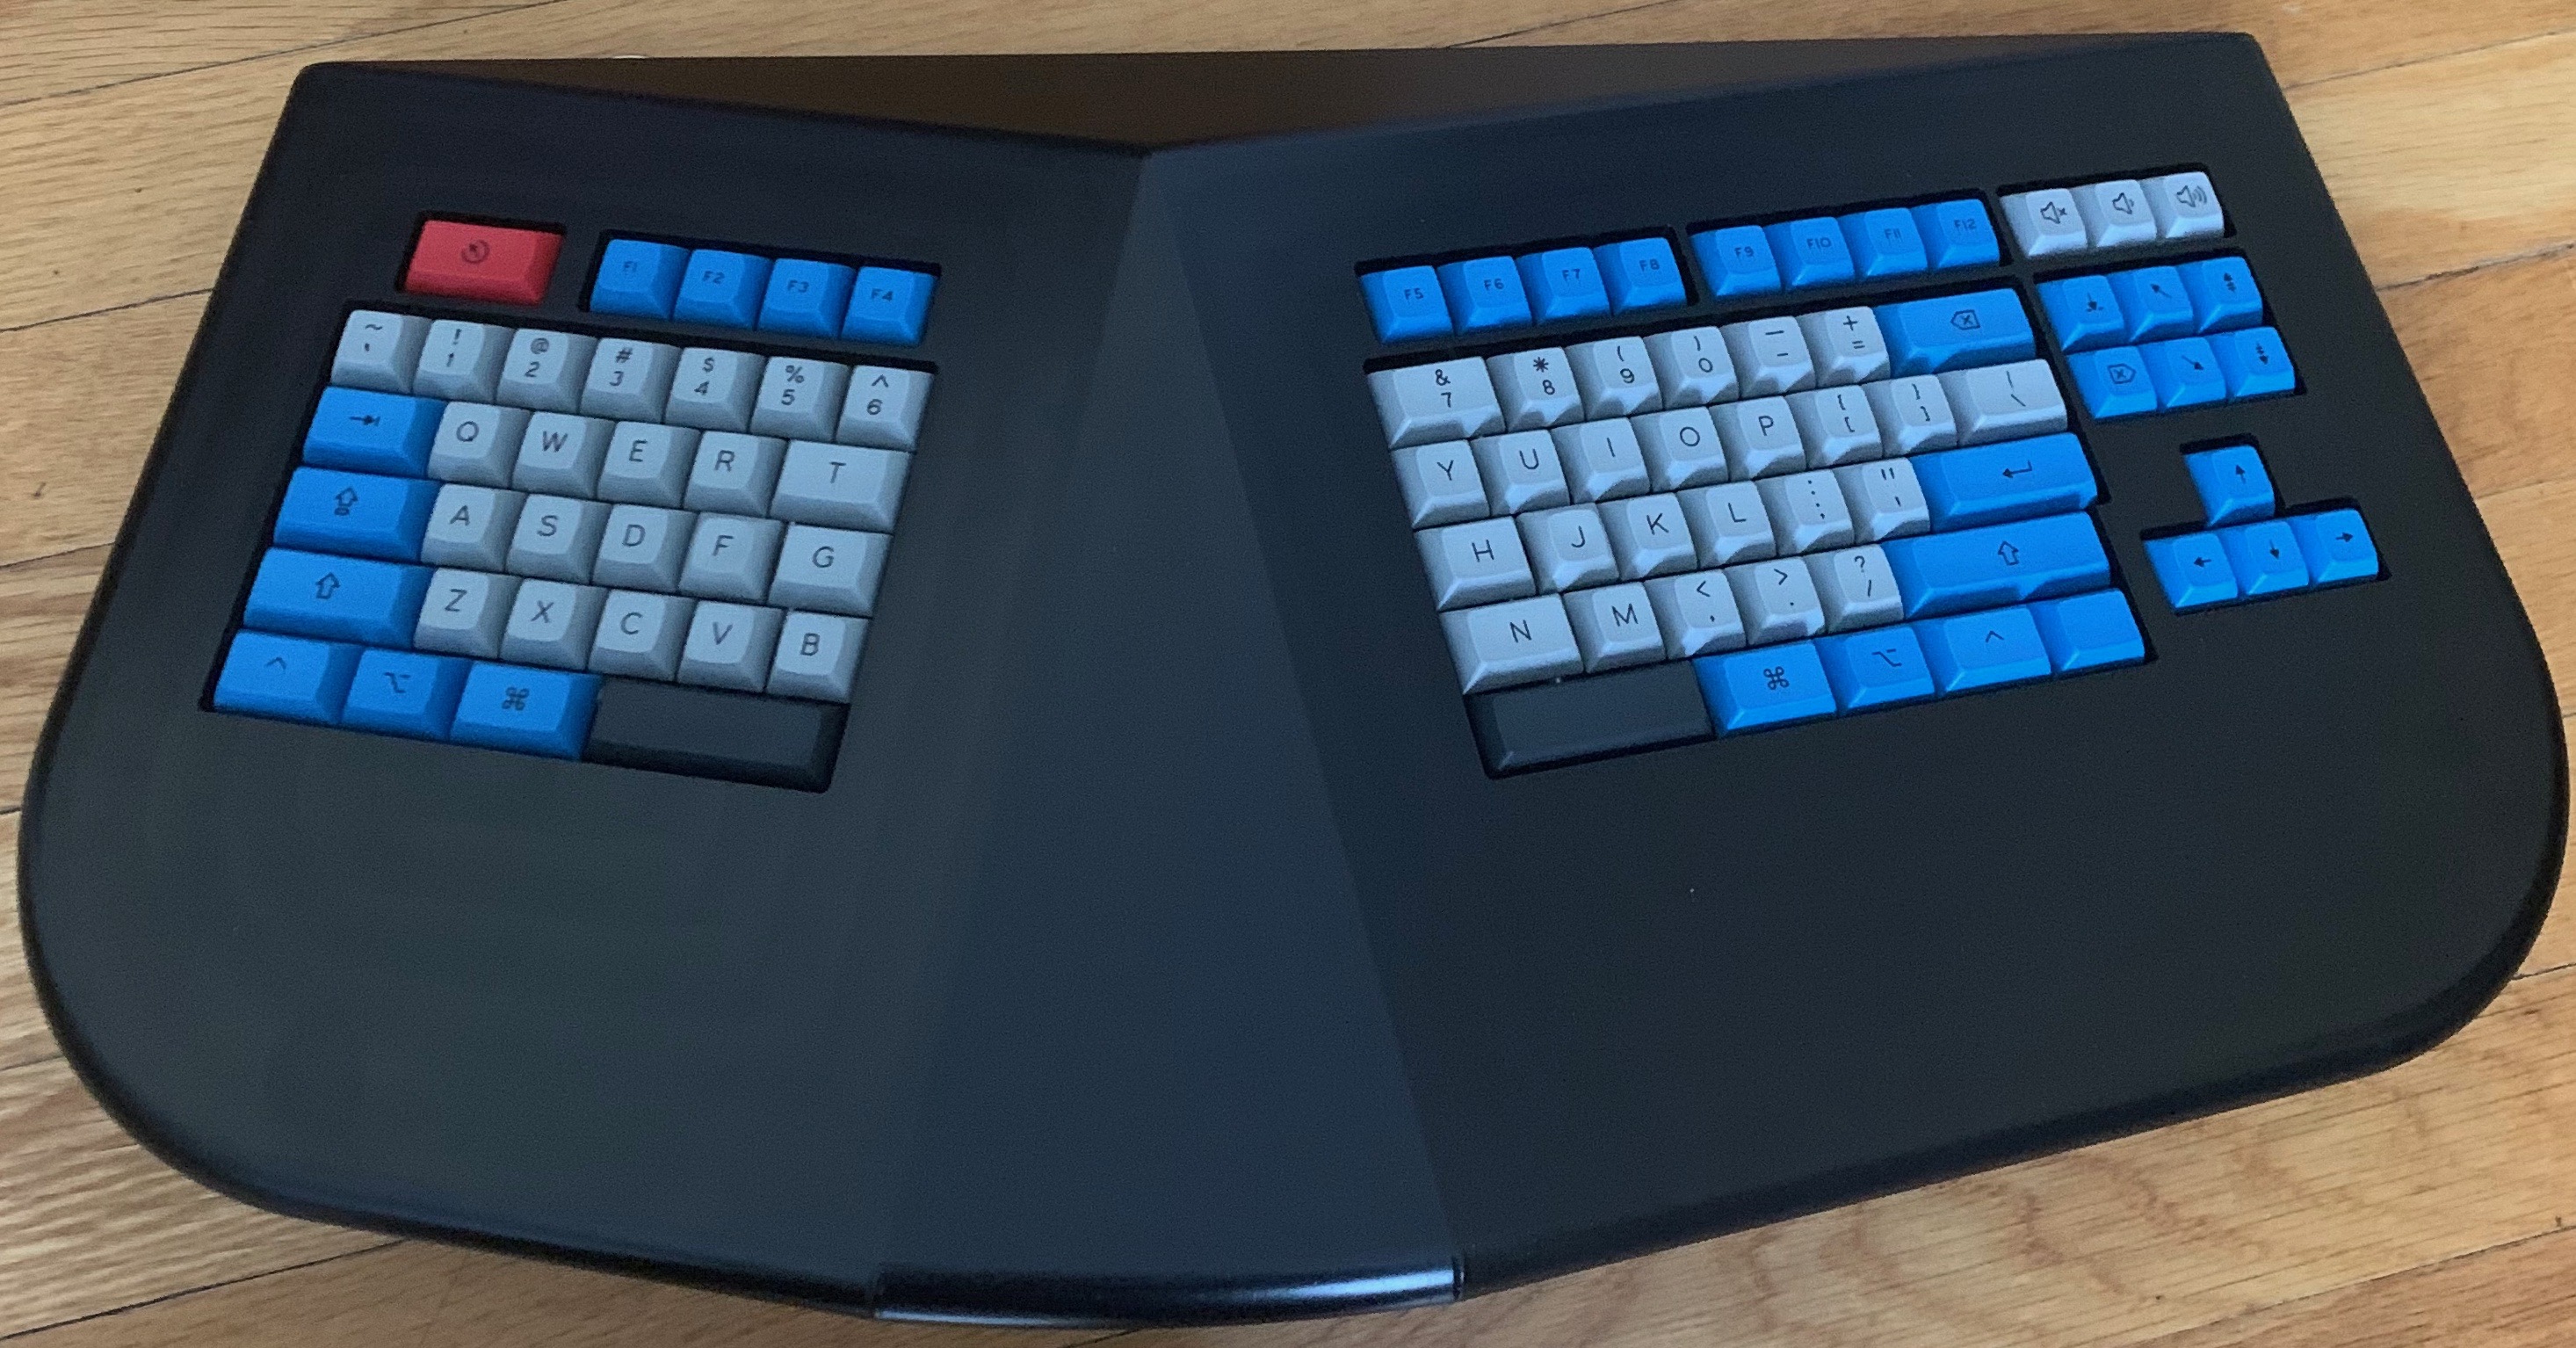
I want a better keyboard but my plea to the industry had no effect. Since no one would make one for me I built the keyboard myself. My main goals were:
Standard split-QWERTY layout mirroring the Microsoft Natural Keyboards No number pad High quality mechanical switches Bluetooth and USB-C connections Plug and play (no-solder) microcontroller replacement Layout Building a keyboard naturally starts with designing the key layout. I used the wonderful Keyboard Layout Editor to build a tweaked version of the classic Microsoft Natural Keyboard layout.
Our house is old. City records show it was built in 1910, but that’s just the age the city assigned to all the houses older then that. Our neighbors, who have a house that started life as a mirror image of ours, have found old newspapers in their attic from the 1870s making that our best guess for the age.
In some cases having an old house is great: structurally the house is solid.
Over on Hacker News, there is a discussion about Atwood’s new keyboard. It looks nice, but it’s not my ultimate keyboard. So bored rich people out there, build me a better keyboard.
First, it needs to be ergonomic. Microsoft has pretty much perfected this, so let’s start by copying their natural keyboard design. The basic wave shape and key layout of the current natural keyboards is great, especially since they fixed the layout of the navigation (insert/delete) cluster.
First print on the Replicator 2X After a long wait, my MakerBot Replicator 2X was finally shipped and came in. I’ve wanted a 3D printer for a long time (going back to the Cupcake days) and only this year was able to convince my wife that we “needed” one.
Two problems were apparent right away: no cover and no magnetic latch on the front door. Both of these are vital for keeping warm air around ABS, and keeping cats out in progress prints.
After much screwing around, I finally got the ST7565 working with the Arduino Due. The wonderful u8glib recently added support for the Due and had preexisting support for the ST7565.
I’m still annoyed that I can’t get the adafruit library to work on the Due. I’m slowly porting bits of the u8glib SAM code path for the ST7565 over, but frankly I’m just annoyed with displays at this point, so I’m going to go on the something more interesting, like actually adding a clock to my alarm clock.
I’ve spent the last several days unsuccessfully trying to get the ST7565 to work with the Arduino Due. I’ve been trying to port ladyada’s ST7565 library to the SAM core without much luck.
Using the ST7565 with Uno and the library works with no issues, as would be expected, so I didn’t fuck up soldering or anything easy to diagnose like that.
Getting the code to run on the Due is not as easy.
One of the things I knew going into this project was that I wanted the alarm clock to be compatible with Arduino. Ideally I’m going to expose as many of the Arduino’s pins on the final product in an accessible way so people can slap on shields and extend the clock to make it better.
This then begs the question: which Arduino? I have both a Uno and a Due. While I like the simplicity, support and cost of the Uno, the Due seems more future proof.