Learning to Solder
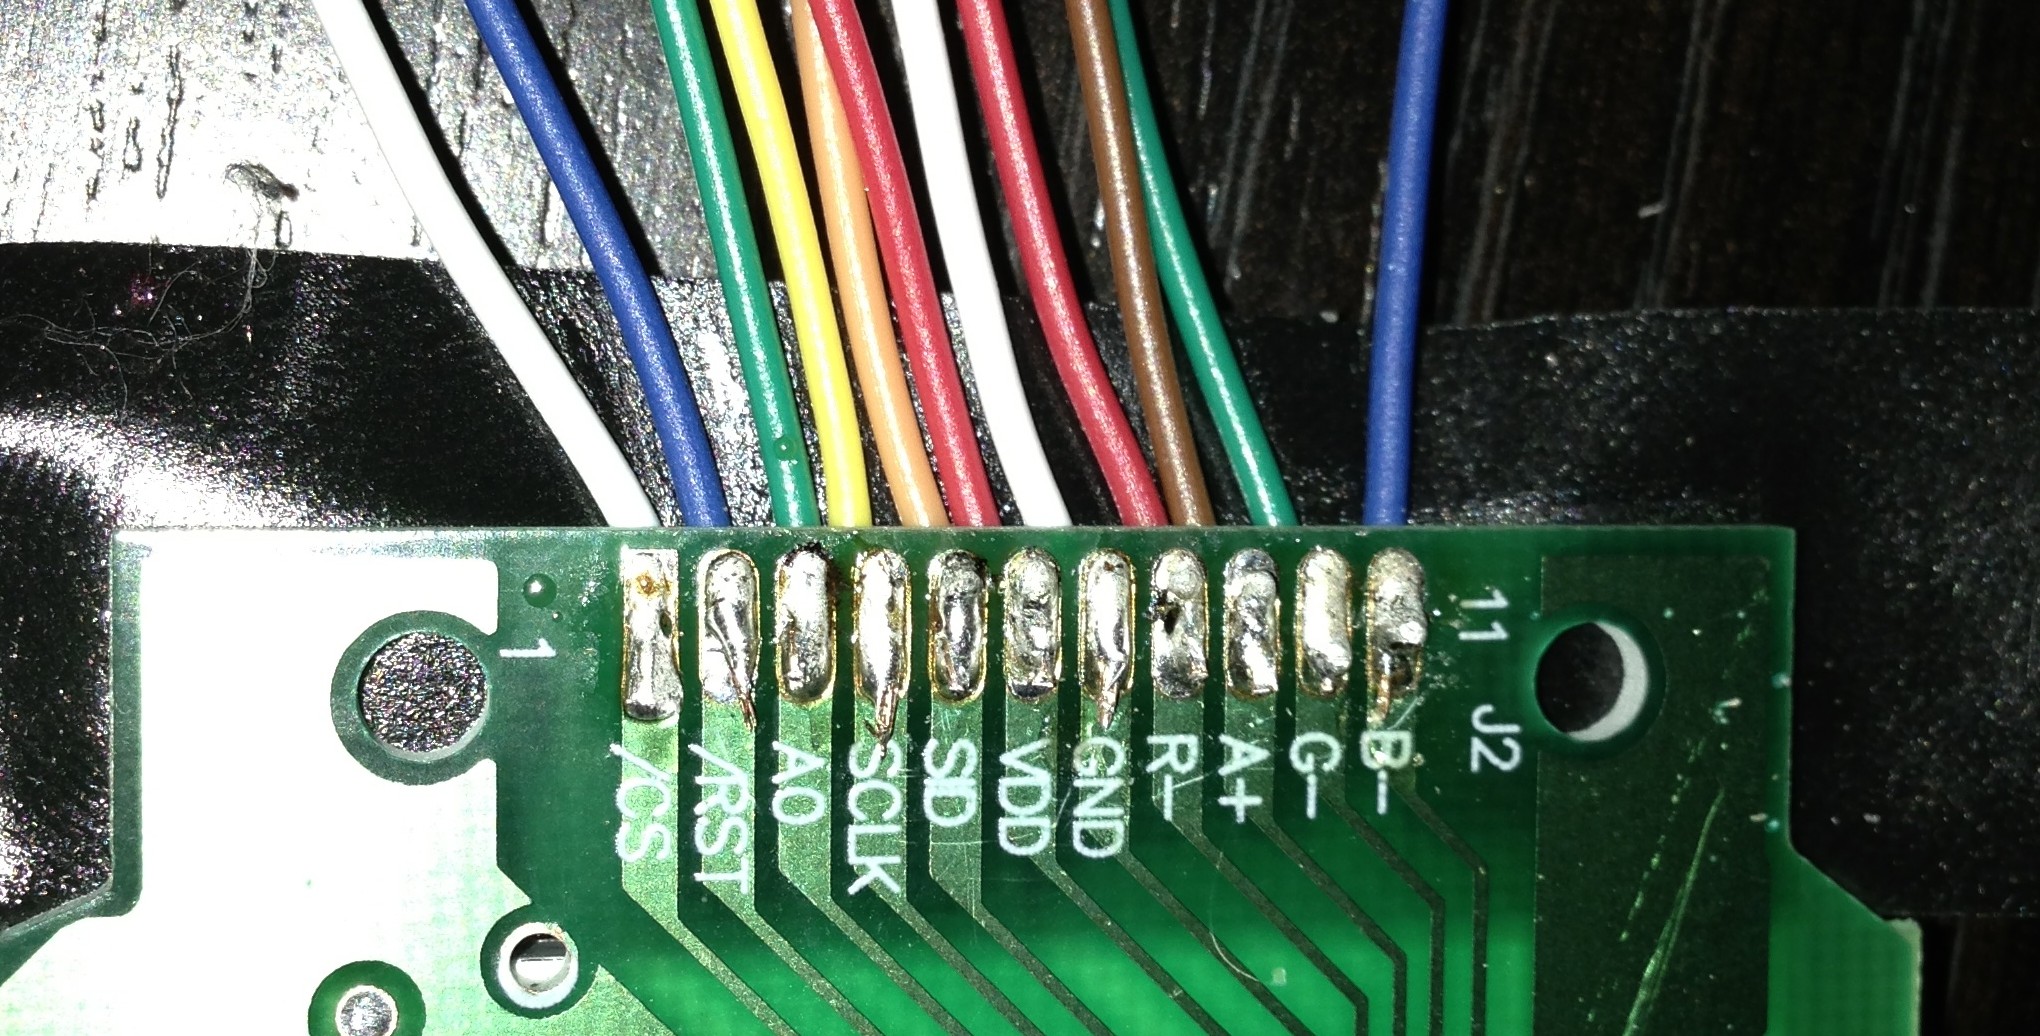
One of this things I knew I need to learn to build the world’s best alarm clock was how to solder. And I was right: one of the first things I needed to do was solder wires to the ST7565 display I got from adafruit so I could hook it up to the Arduino at the heart of the clock.
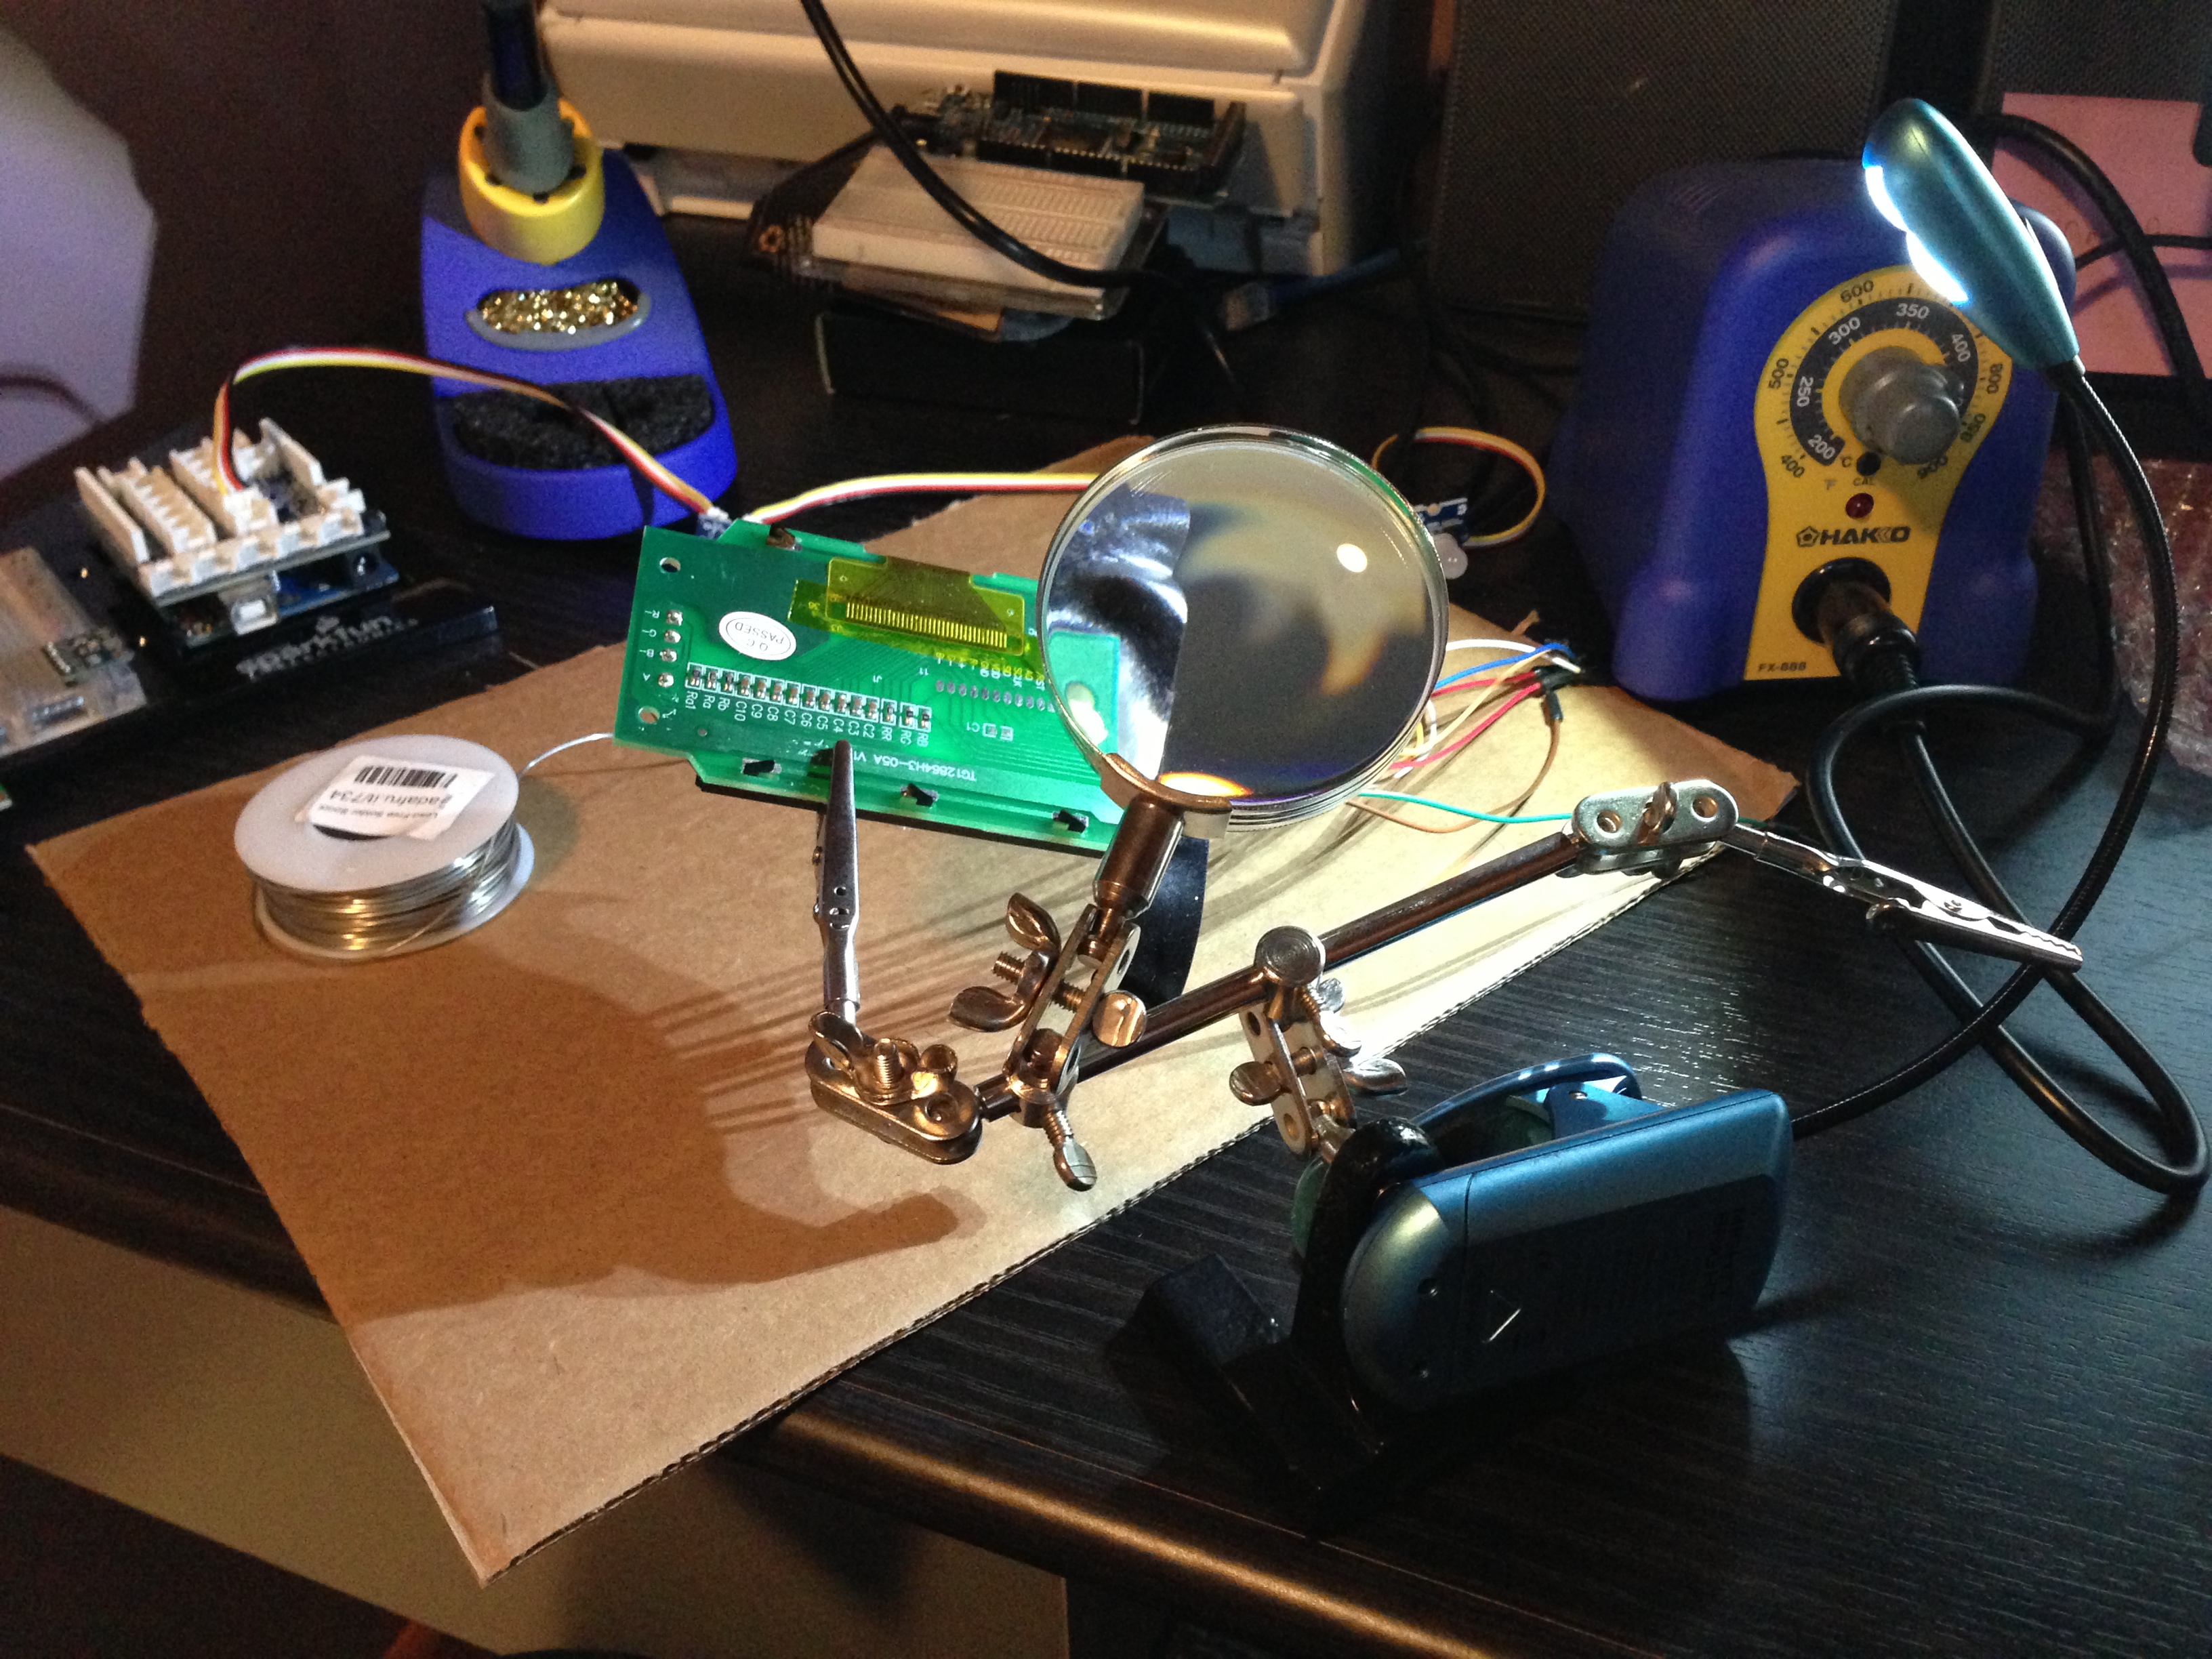
Problem 1: I don’t have a soldering iron. Some quick Googling show that there are a lot of cheap soldering irons out there, and that you can probably get away with using them if you’re not doing a ton of work. But everyone seems to agree that the Hakko FX-888 is the best there is.
I generally like to buy the best tools I can get. Cheap tools are just frustrating, I’ve found it better to spend a little more up front to have the pleasure of using a well designed, well made product. Hell, that’s why I’m building a my own alarm clock. So rather then cheap out, I got the FX-888. I also read through adafruit’s excellent guide to soldering which was as excellent as described. It convinced me to get their Helping Third Hand Magnifier which was extremely helpful in seeing little things. I also picked up a clip on LED light from Amazon since my workspace is a little dim.
Now to plug this in to an Arduino and make it work.